How to hold a piping bag
Your dominant hand should hold the twisted part of the piping bag nestled between the index finger and thumb, with the bulk of the bag cradled by your hand. This hand will be the one applying pressure to the piping bag. Your other hand will guide the piping bag, usually using one or two fingers laid against the side of the bag near the tip, as you pipe.
Equipment:
Any buttercream or pipeable frosting
Any size round or plain piping tip
Reusable or disposable piping bags
Rubber spatula
Small offset spatula or spoon
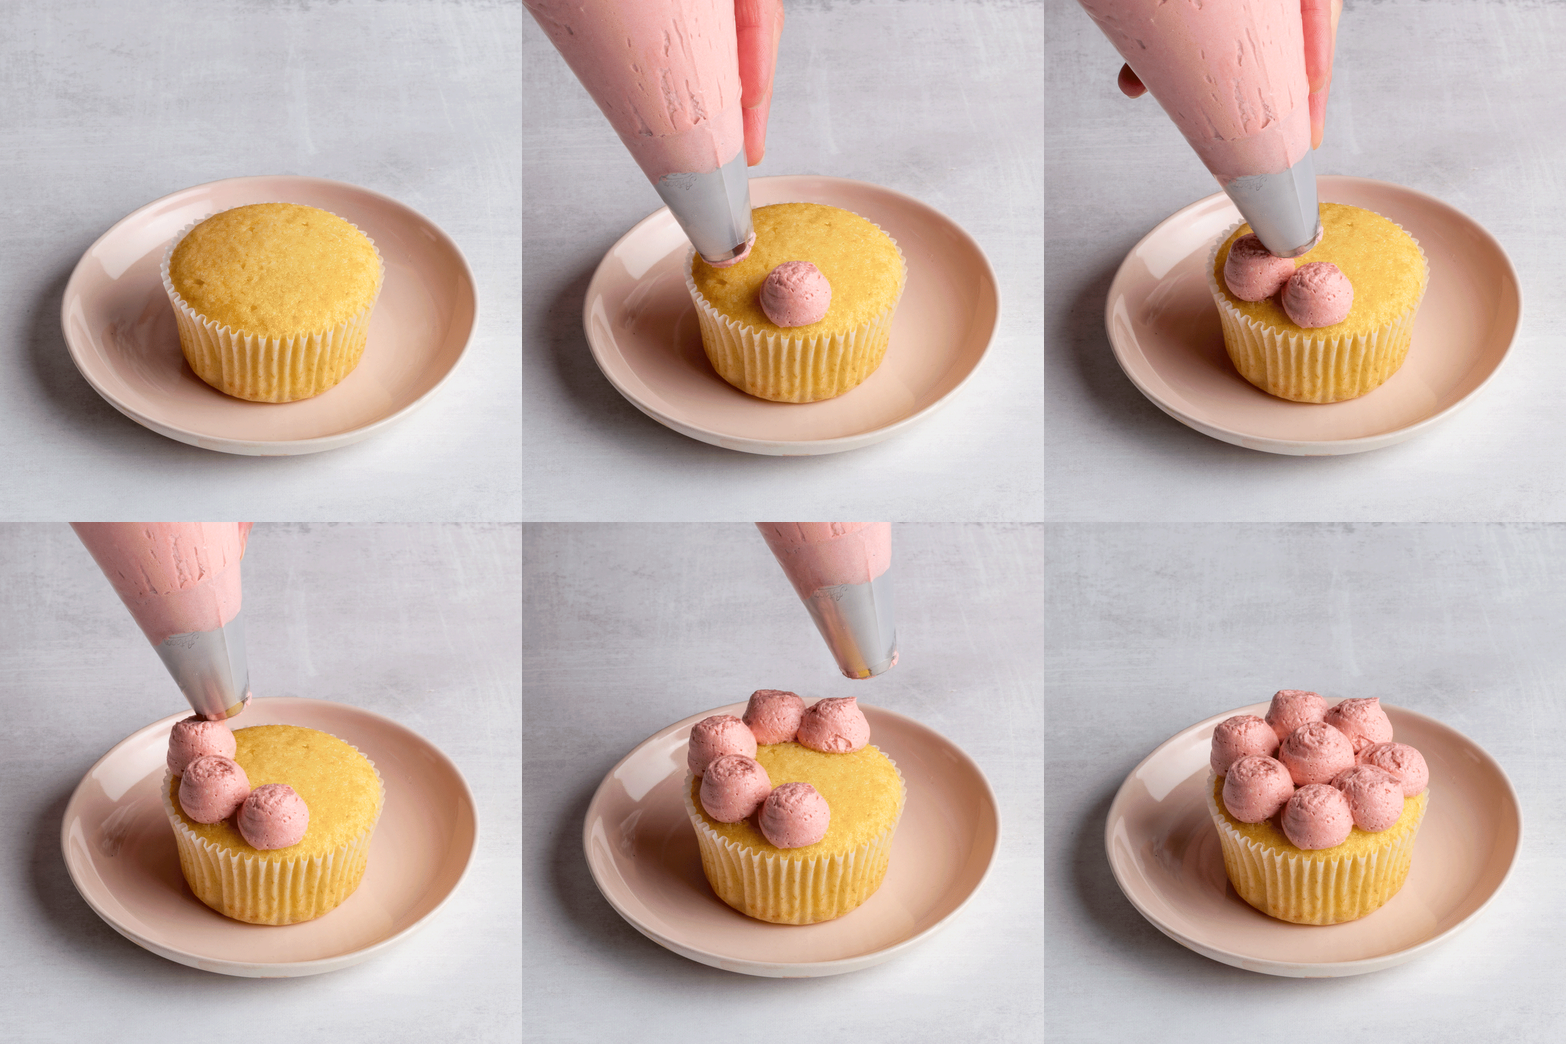
- Dots: Hold a piping bag fitted with any size round or plain tip perpendicular to the surface you plan to pipe on. Squeeze the piping bag with even pressure and release the pressure when finishing off the dot. While releasing the pressure on the bag, make a slight swiping motion with your dominant hand (the one holding and squeezing the piping bag) to “cut-off” the tail/tip. If you do end up with any tips, lightly tap the tips down with a damp finger or a finger lightly dipped in icing sugar or cornstarch.

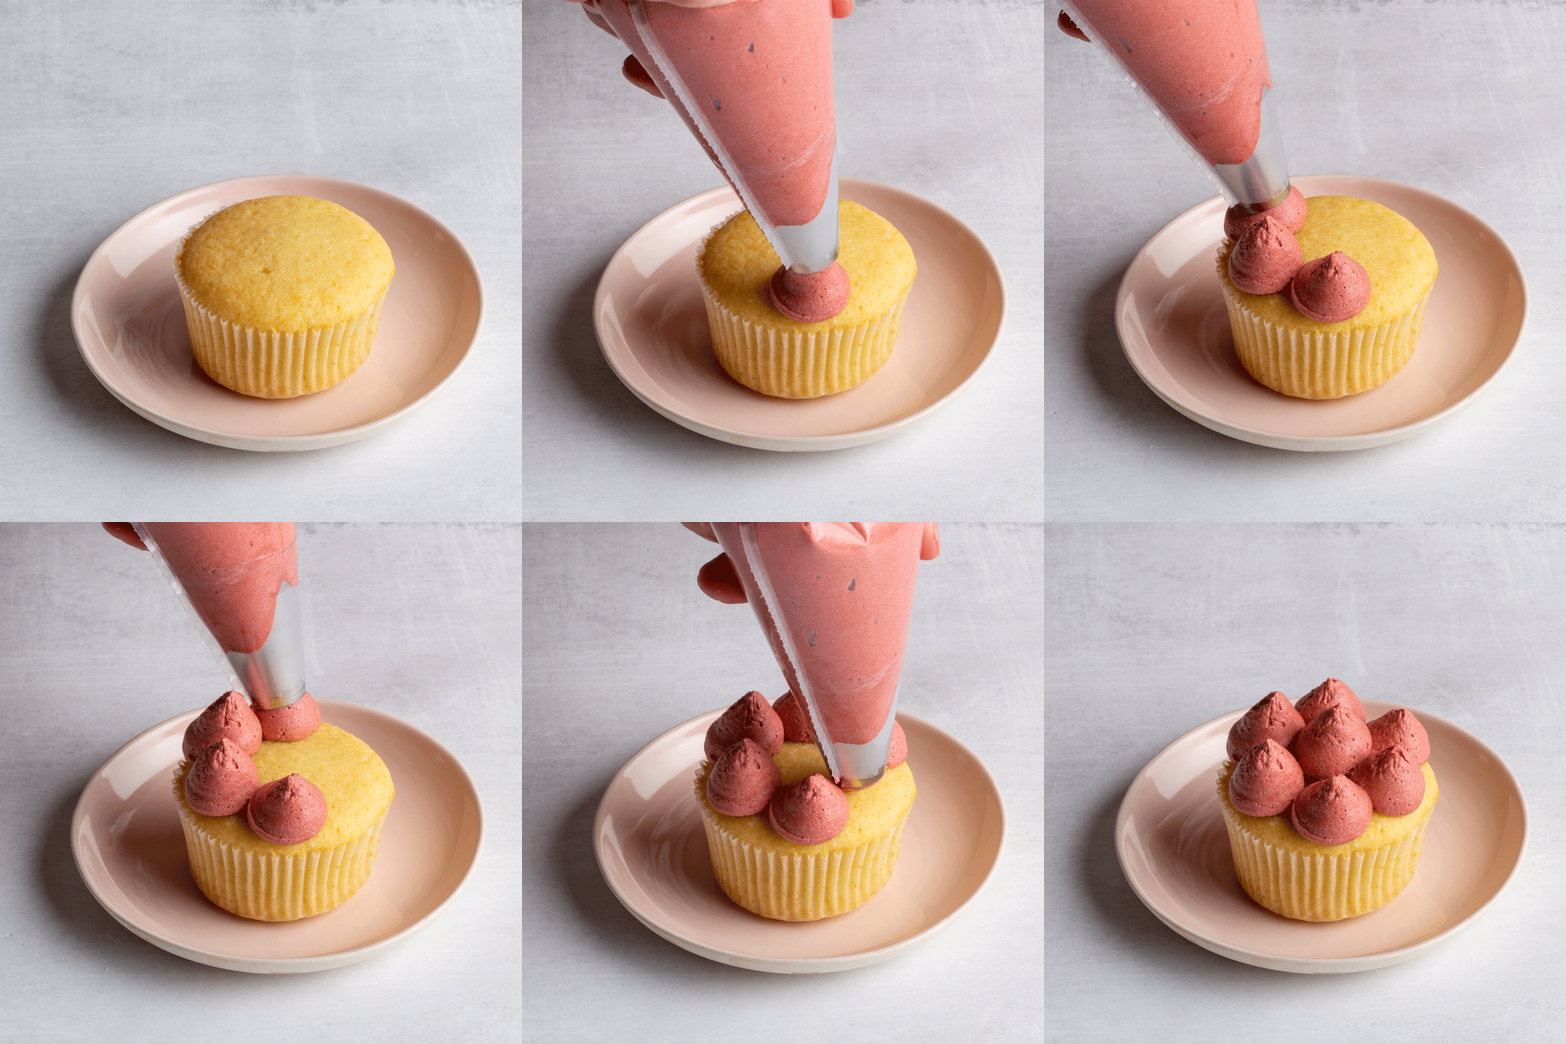
- “Kisses”: Follow the same process for making a dot, but instead of making a swiping motion, pull the piping bag straight up while slowly releasing the pressure. This movement will pull the icing up and create the tip/point.

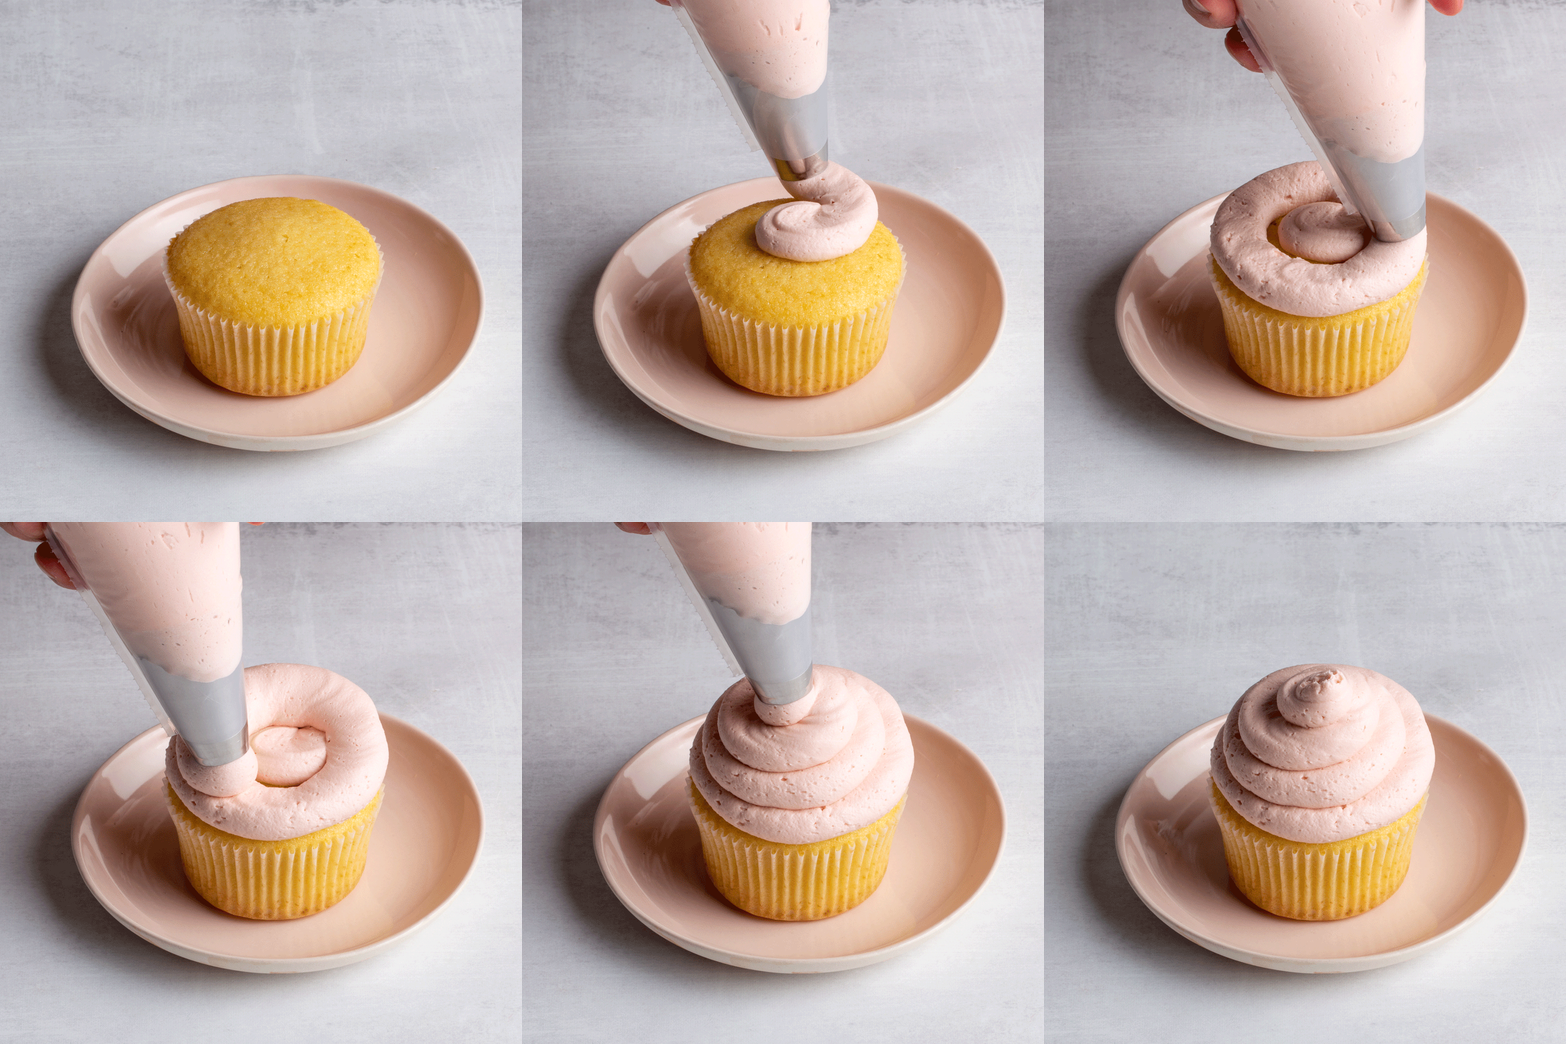
- Swirl: Hold a piping bag fitted with any size round or plain tip, about a half-inch above and perpendicular to the surface you plan to pipe on. Start at the centre and apply even pressure to the piping bag, depositing a small mound of icing in the middle of the swirl while moving the bag in a rounded “e” configuration towards the outer edge of the swirl (for example, the outer edge of a cupcake). Continue applying even pressure and swirling the piping bag until you close the outer circle. Move the bag slightly inwards, overlapping the inner edge of the outer “circle” of icing. Repeat this process (about 3 or 4 loops) until the swirls are small enough to create a “mountain”. When you reach the top, release the pressure and pull straight up to create a peak, or make a slight swiping motion with your dominant hand to flatten or cut off the tip.

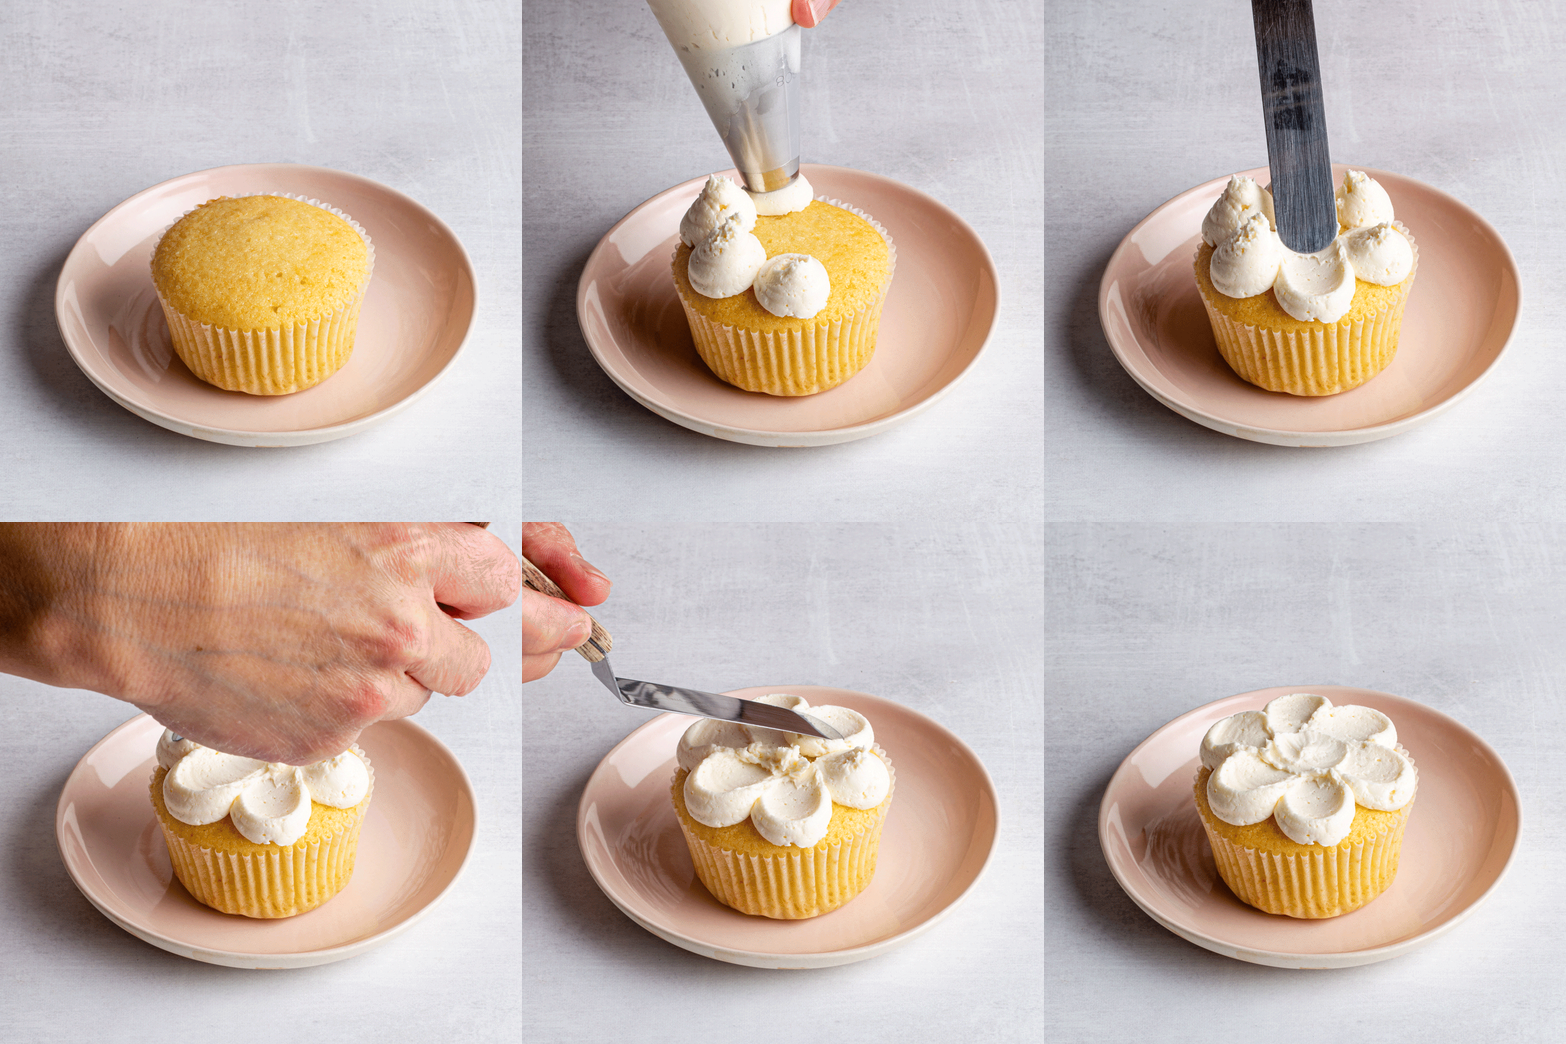
- Flower Petals or Scales: Hold a piping bag fitted with any size round or plain tip about a half-inch above and perpendicular to the surface you plan to pipe on. Squeeze the piping bag with even pressure and release the pressure when finishing off the dot. Do not worry if you have tips on your dots as these will be smoothed out when creating the scales/petals.
To create a flower, pipe evenly sized dots in a circle. With an offset spatula smaller than the dot, press down into the centre of each dot while pulling the spatula towards the centre of the circle. For a fuller flower, pipe another row of dots, spaced in between the “V” created by the first row of petals. With the offset spatula, flatten the second row of petals. Repeat process, if desired. Finish the flower by piping a dot in the centre of the flower and leaving it as is, or smoothing it out with the offset spatula. For a different look, instead of using the same size piping tip, use a piping bag fitted with a small plain tip to pipe tiny dots or “kisses” to create the centre of the flower.
For a scaled look, pipe a row of evenly-sized dots starting on one end of the surface. With an offset spatula (smaller than the dot) or the back of a small spoon, gently press down into the centre of each dot while pulling the utensil in the direction you want the scales to go. Pipe the next row of dots over the “tails” of the flattened dots. Repeat the process until the surface is covered in scales.
